Getting Started
The Computle Portal
The Computle Portal at https://portal.computle.com is the admin site for your organisation. Administrators use it to see every workstation and who it is assigned to, start and restart workstations, manage users and sign-in, deploy software and patches, and set the policies that apply to every session.
Sign in
Section titled “Sign in”-
Go to
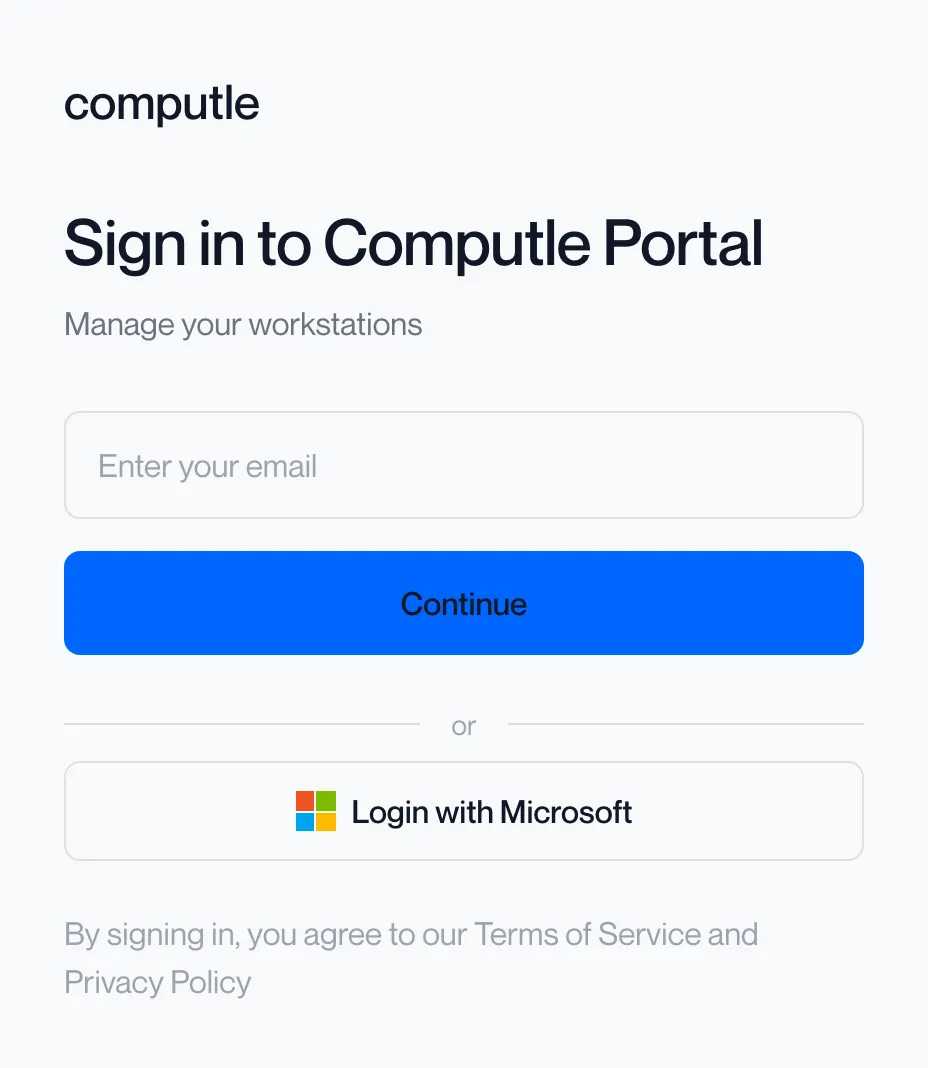
https://portal.computle.com.The page reads “Sign in to Computle Portal”. It offers two ways in: an email address with a Continue button, and Login with Microsoft.
-
Click Login with Microsoft and sign in with your work account, or enter your email and click Continue.
Login with Microsoft uses your organisation’s Microsoft Entra sign-in, including any multifactor authentication it requires. Continue sends a one-time sign-in link to the address you typed; the portal shows “Magic link sent to your email!” and waits for you to open it. Which methods your organisation allows is set under Sign-in methods; see Sign-in methods.
-
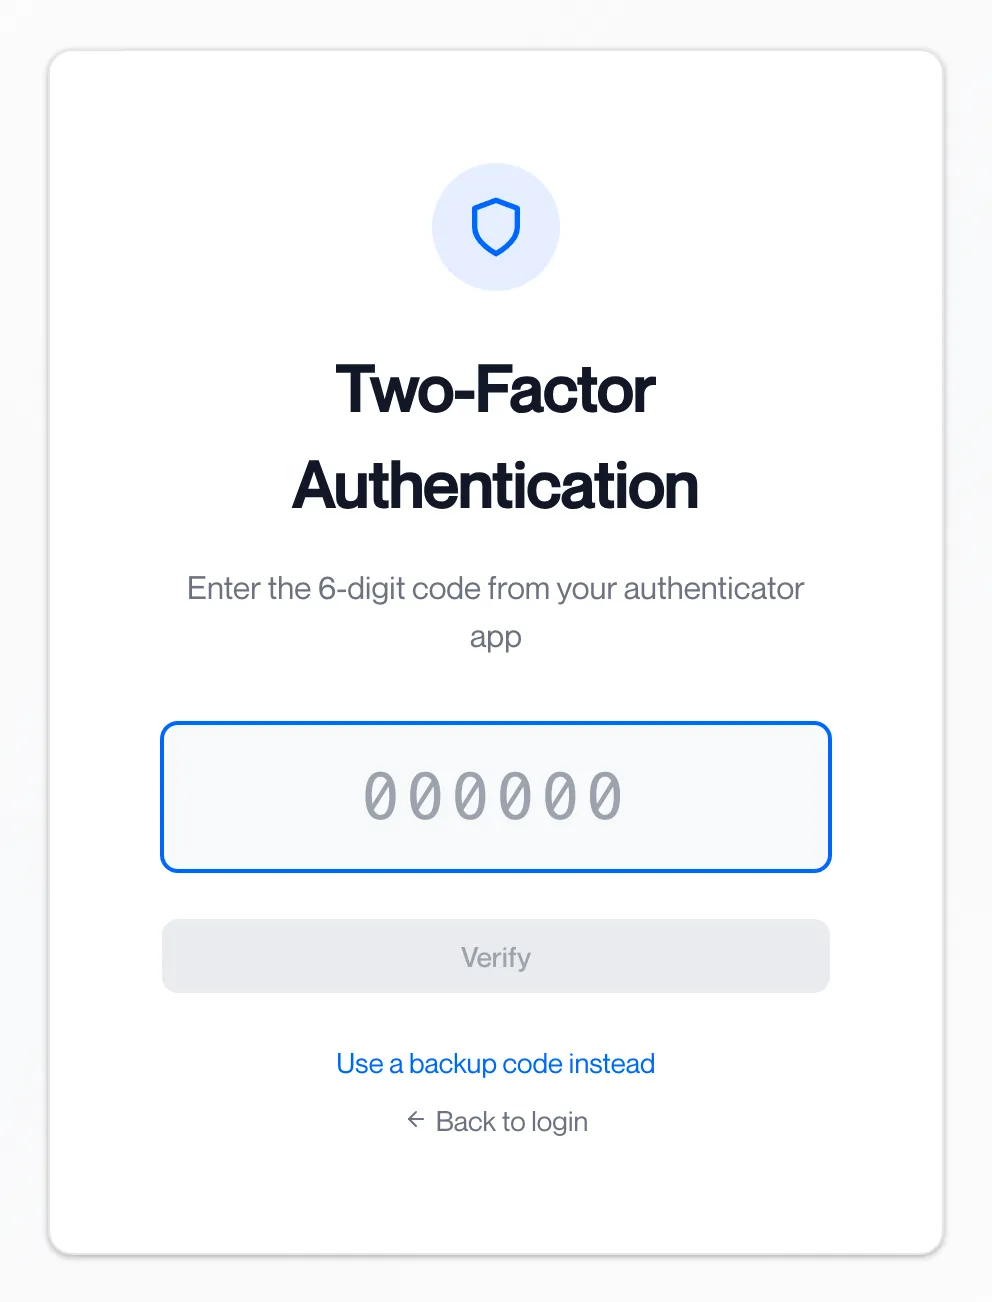
If the portal asks for a verification code, enter the 6-digit code from your authenticator app.
The Two-Factor Authentication page reads “Enter the 6-digit code from your authenticator app”. Click “Use a backup code instead” to enter one of your backup codes. Your own authenticator app and backup codes are set up under Settings.
-
The portal opens on the Dashboard.
Your name and role appear at the top right of every page: Tenant Admin, User, or Ticket viewer. Click them for Settings, Help and Logout. The System Status badge beside them links to
https://status.computle.com.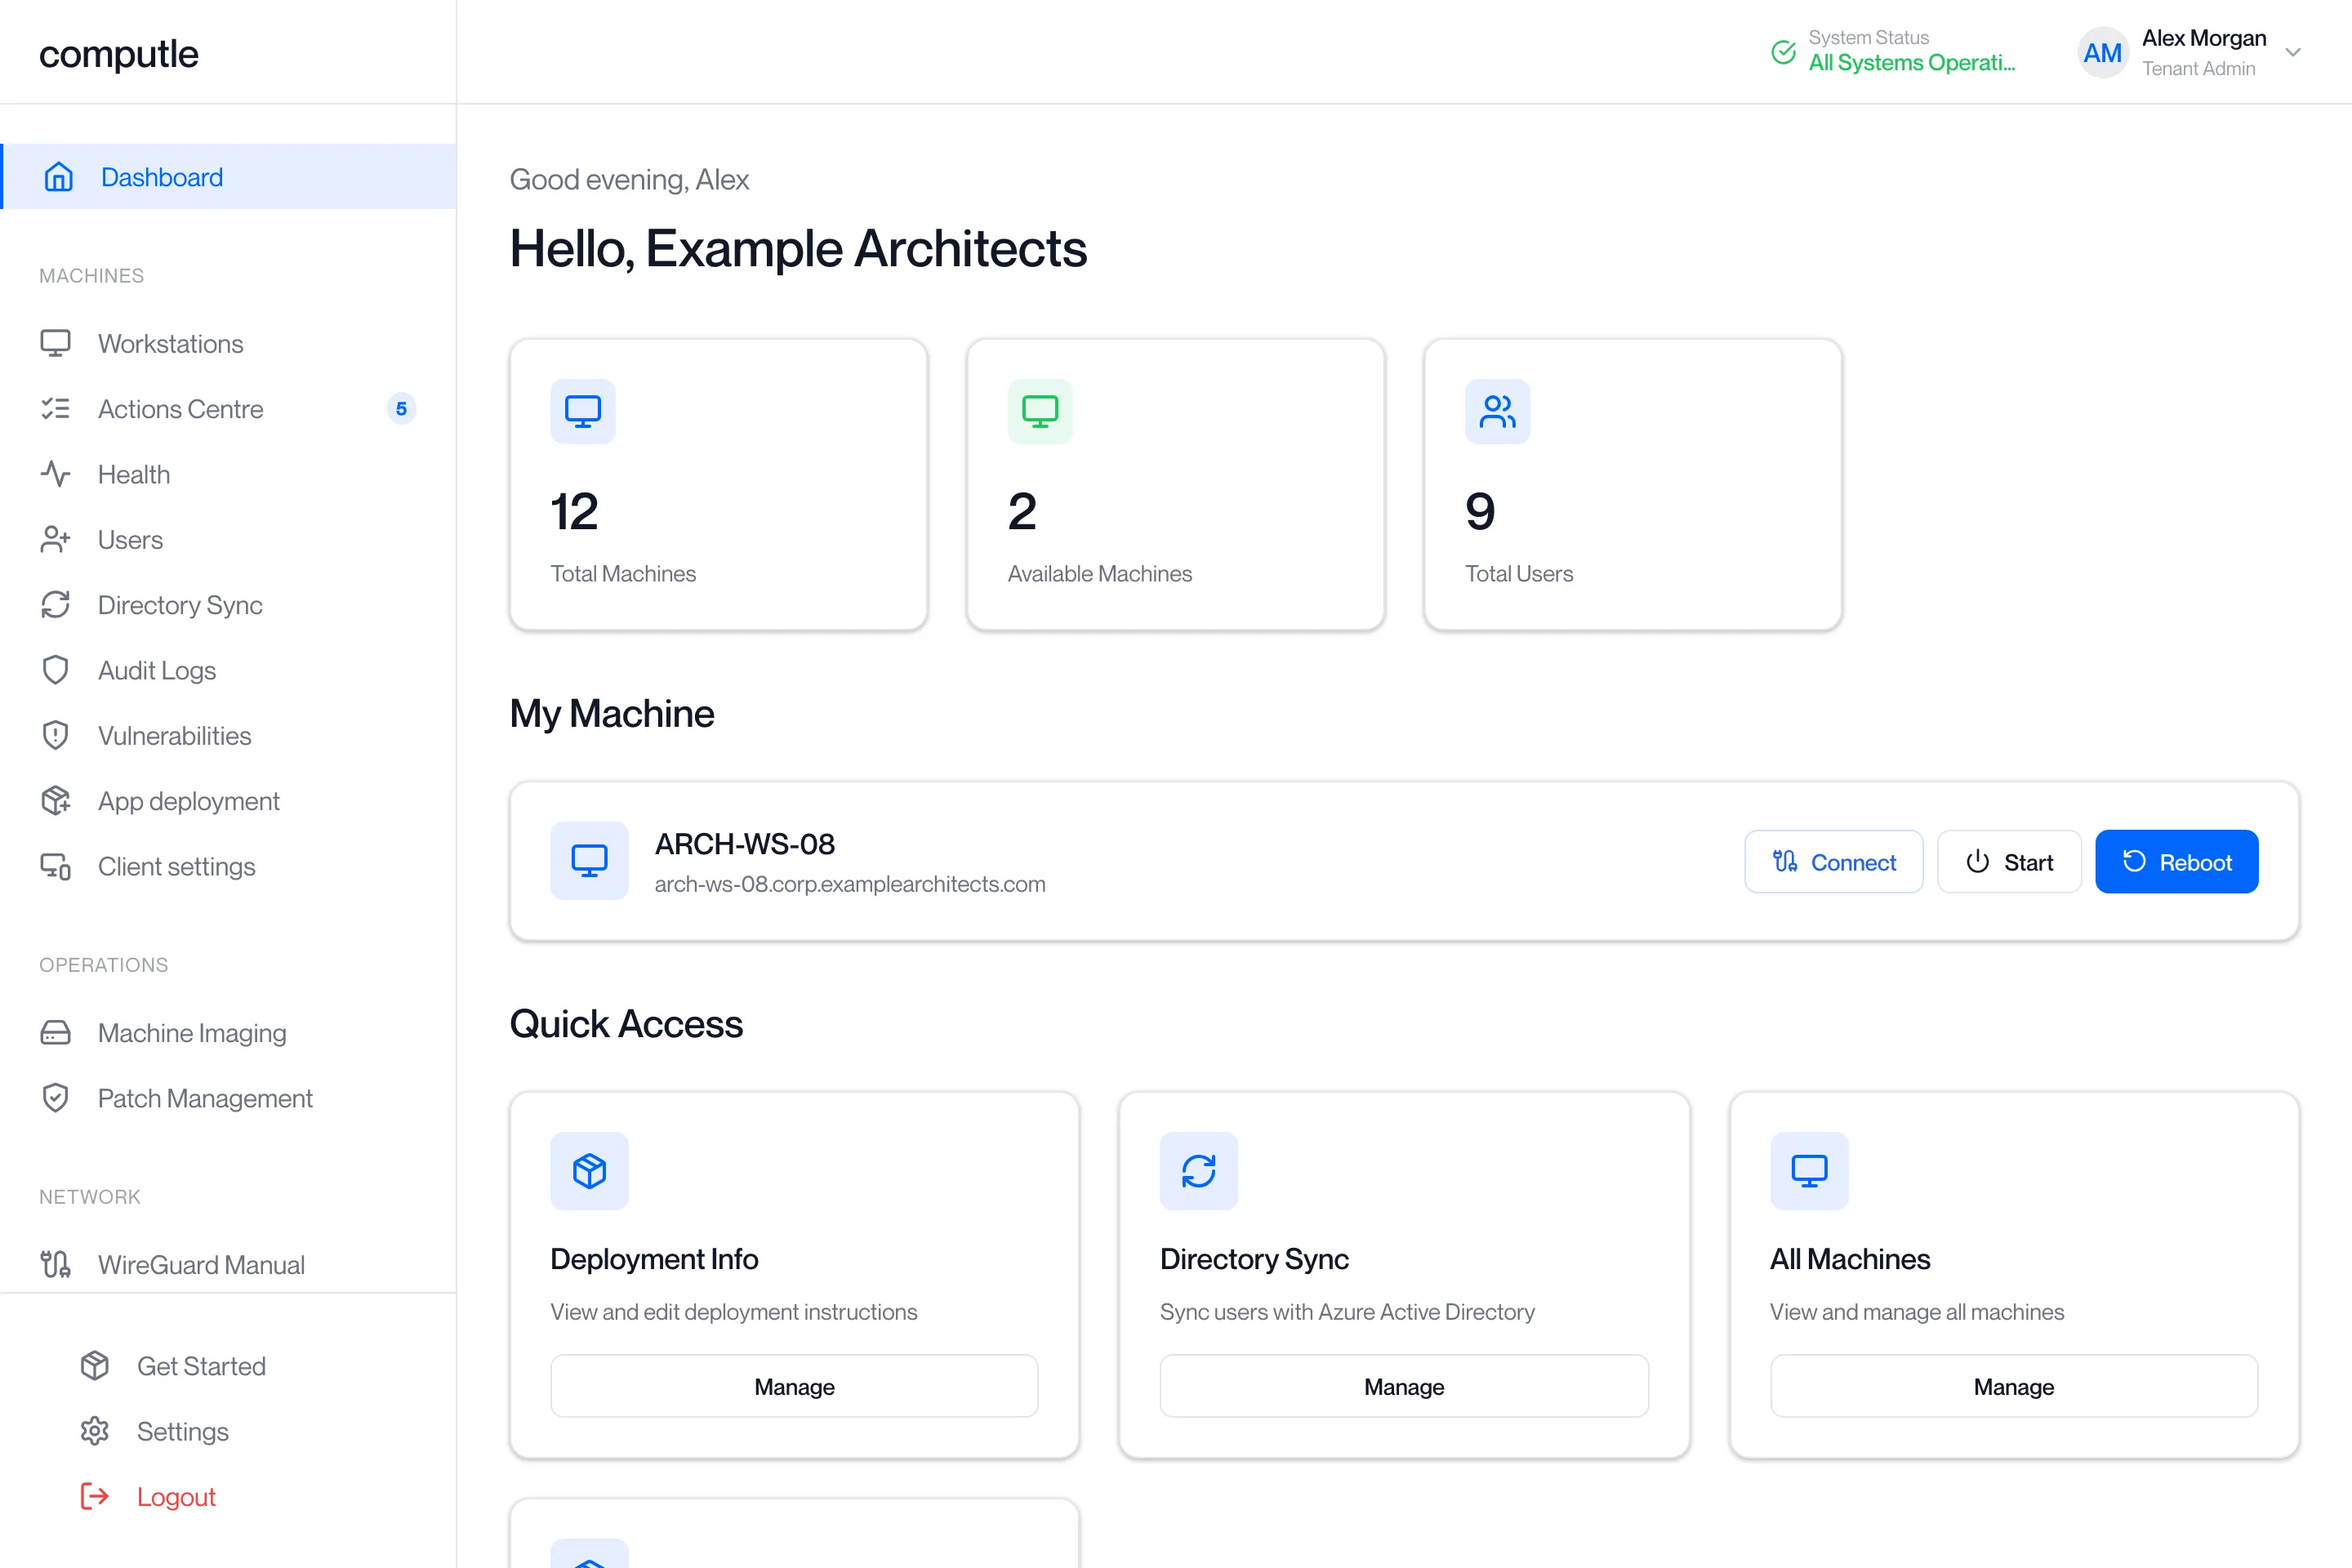
The sidebar
Section titled “The sidebar”The sidebar is built from your role and from the features and modules enabled for your organisation. An entry you cannot see is either not part of your subscription or needs a role you do not hold.
Everyone
Section titled “Everyone”| Entry | What it is for |
|---|---|
| Dashboard | For an administrator: counters for Total Machines, Available Machines, Total Users and Active Users, and Quick Access cards for Deployment Info, Directory Sync, All Machines and Get Started. For a user: their own assigned workstation with Connect, power on and reboot. |
| Get Started | Download the client and connect to a workstation. |
| Settings | Your own account: Appearance (light, dark or system theme), the monthly workstation usage report email (administrators only), and two-factor authentication. See Settings. |
| Logout | Signs you out of the portal. |
For an administrator, Get Started and Settings sit at the bottom of the sidebar.
Machines
Section titled “Machines”Shown to Tenant Admins.
| Entry | What it is for | Page |
|---|---|---|
| Workstations | Every workstation, its status, health, patches and directory join, with power, console and assignment actions. | Workstations |
| Actions Centre | Outstanding actions for your organisation. The number beside the entry is the count waiting. | Actions Centre |
| Health | The state of every workstation’s agent and its health checks. | Health |
| Users | Everyone in your organisation, their roles and invitations. The page also holds the Single Sign-On and Entra join tabs when those features are available to your organisation. | Users, Single Sign-On, Entra join |
| Directory Sync | Keeping users in step with your Microsoft directory. | Directory Sync |
| Audit Logs | Who did what in the portal. | Audit Logs |
| Vulnerabilities | Known vulnerabilities on your workstations. Shown only when the module is licensed for your organisation. | Vulnerabilities |
| App deployment | Upload applications and deploy them to workstations. Shown only when the module is licensed for your organisation. | App deployment |
| Client settings | Device features, the menu tab, sign-in methods, branding, kiosk terminals and diagnostics for the client. | Client settings |
Operations
Section titled “Operations”Shown to Tenant Admins when your organisation has the feature.
| Entry | What it is for | Page |
|---|---|---|
| Machine Imaging | Capture an image of a workstation and deploy it to others. | Machine Imaging |
| Patch Management | Windows updates across your workstations. | Patch Management |
Network
Section titled “Network”Shown to Tenant Admins when your organisation has the feature.
| Entry | What it is for |
|---|---|
| Site-to-site VPN | The VPN between your office and Computle. See Networking. |
Monitoring
Section titled “Monitoring”Shown to Tenant Admins when your organisation has the feature.
| Entry | What it is for | Page |
|---|---|---|
| Network Usage | Network traffic for your workstations. | |
| Workstation Telemetry | Resource use over time for each workstation. | Workstation Telemetry |
| Energy Report | Energy use and carbon for your workstations. | Energy Report |
| Latency | Connection latency for your workstations. | |
| Usage Report | Who used which workstation and for how long. | Usage Report |
Support
Section titled “Support”| Entry | What it is for | Page |
|---|---|---|
| Support | Raise and follow support tickets. Shown to Tenant Admins when your organisation has the feature, and to Ticket viewers. | Support |
Billing
Section titled “Billing”| Entry | What it is for | Page |
|---|---|---|
| Billing | Invoices and payment. Shown only to a Billing Administrator; a Tenant Admin does not see it. | Billing |
Who sees what
Section titled “Who sees what”| Role | Sees |
|---|---|
| User | Dashboard with their own workstation, Get Started, Settings. |
| Tenant Admin | Everything under Machines, plus Operations, Network, Monitoring and Support when your organisation has those features. |
| Billing Administrator | Billing. The role is separate from Tenant Admin so that outsourced IT can administer workstations without seeing invoices. |
| Ticket viewer | Support only. |
A person can hold more than one role.
Your workstation on the Dashboard
Section titled “Your workstation on the Dashboard”Every user, whatever their role, sees their own workstation on the Dashboard under My Machine (or My Machines when more than one is assigned to them). The card shows the workstation’s name and its address, with Connect, Start and Reboot buttons.

If no workstation is assigned to you the card reads “No machine assigned” and “Please contact your administrator to get a machine assigned.” An administrator assigns one on the Workstations page; see Assigning workstations.
Connect to your workstation
Section titled “Connect to your workstation”-
Click Connect on the workstation card.
The button appears only when the workstation’s connection method is Remotle or DCV. For any other method, connect from the client directly.
-
The client opens on your computer.
The portal shows “Connecting to …” and the client takes over. If the link cannot be opened the portal says “Remote connect is not available for this machine”; ask your administrator to check the connection method.
Start your workstation
Section titled “Start your workstation”-
Click Start.
The button shows a spinner while the request is sent. The portal reports “Start initiated successfully”, or shows the progress under the card.
-
Wait for “Your workstation is ready.”
The card reads “Starting up — this usually takes a few minutes.” while the workstation powers on. If the workstation was already on, the card reads “This workstation is already running.” Start and Reboot stay greyed out until the start finishes.
Reboot your workstation
Section titled “Reboot your workstation”-
Click Reboot.
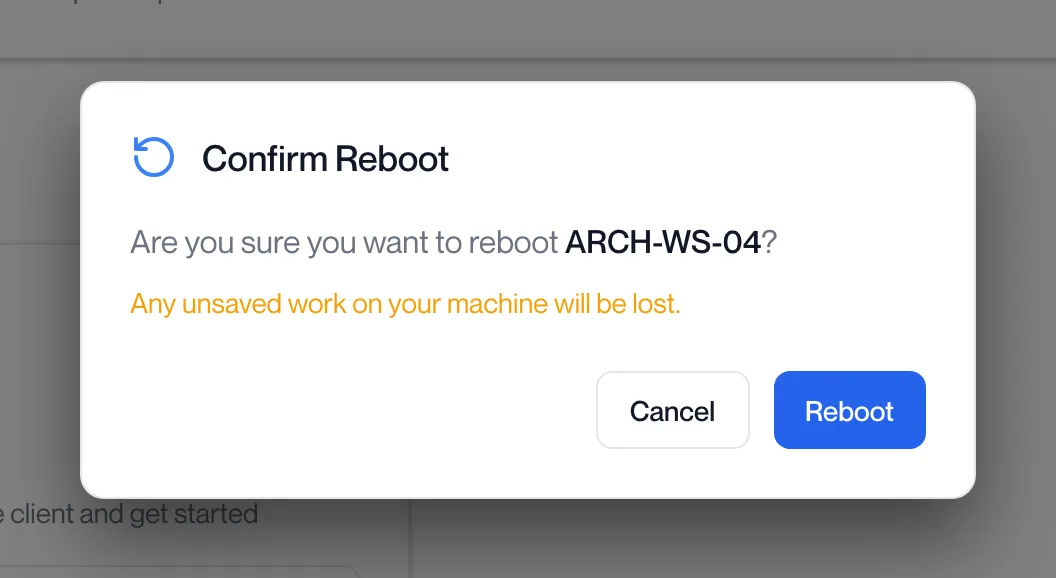
The Confirm Reboot dialog reads “Are you sure you want to reboot …?” and “Any unsaved work on your machine will be lost.”
-
Click Reboot in the dialog.
The portal reports “Reboot initiated successfully”, or shows the progress under the card: “Restart in progress — this usually takes a few minutes.”, then “Restart complete.” If the restart takes longer than usual the card reads “Still working — completing the restart.” and, after 12 minutes, “This restart is taking longer than expected. Our engineering team has been notified and is completing it for you — no action needed.”
-
Connect again once the card shows the restart is complete.
If a start or reboot cannot be issued the portal says “Power operation failed” or shows the reason it was refused. Ask your administrator to check the workstation on the Workstations page.
Sign out
Section titled “Sign out”-
Click Logout at the bottom of the sidebar, or click your name at the top right and choose Logout.
The menu under your name also holds Settings and Help.

-
The sign-in page opens.
You are signed out of the portal on this browser. Sessions in the client are not affected.
Where each page is documented
Section titled “Where each page is documented”Questions
Section titled “Questions”I am an administrator but cannot see Machine Imaging, Patch Management or Monitoring.
Section titled “I am an administrator but cannot see Machine Imaging, Patch Management or Monitoring.”Those entries appear only when the feature is part of your organisation’s subscription. Contact your account manager.
Why can I not see Billing?
Section titled “Why can I not see Billing?”Billing needs the Billing Administrator role, which is separate from Tenant Admin. Ask the person who manages your account to grant it; see Billing.
Where do I set up my authenticator app?
Section titled “Where do I set up my authenticator app?”Under Settings at the bottom of the sidebar. The Security section lets you set up an authenticator app, get backup codes, and for an administrator, require MFA for login across the organisation.